How To Render In Revit 2021 . Use the realistic visual style, which displays. Export the rendered image to a file.
Render black 3D studio vray HELP! YouTube from www.youtube.com
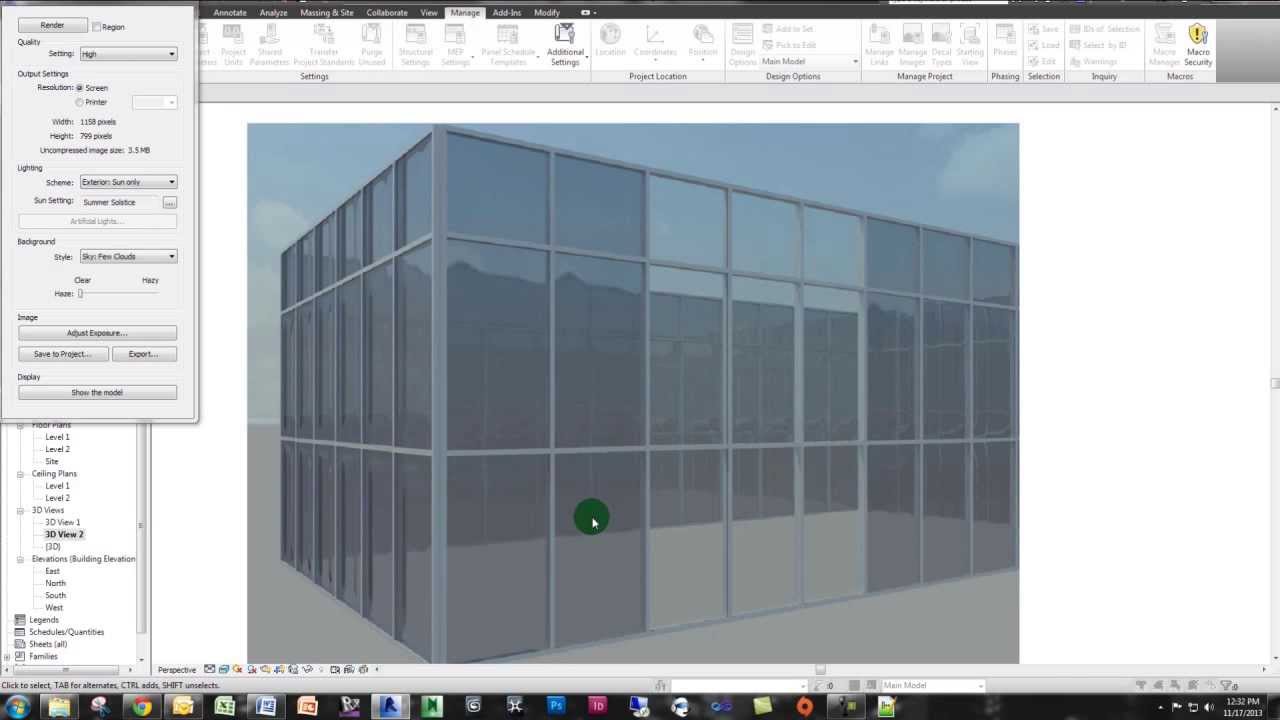
Under output, specify the following: After preparing the 3d view and using the rendering dialog to select desired settings, click render to render the image. How do you save revit renders?
Render black 3D studio vray HELP! YouTube
You can leave these on default to get an idea of what a basic image rendering will look like. Change render settings for a view you can define render settings for a 3d view before or after rendering an image. Send the image to render: Open the image to be rendered and change the size of the view crop.
Source: www.youtube.com
What is the best rendering software for revit? It’s everything all in one. Create the rendered image render the view to create a photorealistic image of the 3d model. To generate a rendered image for printing, select printer. You can then do the following:
Source: www.design8.eu
Create the rendered image render the view to create a photorealistic image of the 3d model. Open the image to be rendered and change the size of the view crop. Click “file” from the sketchup menu, then “open” and pick the project you want to render. And extract it’s content into the following folder: Change render settings for a view.
Source: www.youtube.com
Export the rendered image to a file. Open the image to be rendered and change the size of the view crop. Most renders will give their first image within 30 seconds, but it may take 3/4 hours to give a clear image. Large images (greater than 5 megapixels) may need to be left overnight to become clear. Adjust exposure settings,.
Source: arquitectos.com.py
Revit+enscape exterior rendering workflow tutorial #1: Create the rendered image render the view to create a photorealistic image of the 3d model. Most renders will give their first image within 30 seconds, but it may take 3/4 hours to give a clear image. In the rendering dialog, click show the model. You can then place the rendered view on a.
Source: www.youtube.com
Display the building model in the drawing area. And extract it’s content into the following folder: Revit begins the rendering process, rendering the entire image progressively. In the rendering dialog, click show the model. Export the rendered image to a file.
Source: biblus.acca.it
Large images (greater than 5 megapixels) may need to be left overnight to become clear. Change render settings, and render the image again. Export the rendered image to a file. Click “plugins” from the menu, then “render settings.”. In this post, we test most of the major revit rendering tools.
Source: www.youtube.com
Comparing 6 revit rendering plugins. Two ways to import revit models into lumion. How do you save revit renders? Online rendering options define lighting, background, and exposure settings for rendering a view. You can then place the rendered view on a sheet.
Source: xoio.de
Export the rendered image to a file. And extract it’s content into the following folder: Adjust exposure settings, and render the image again. Click “file” from the sketchup menu, then “open” and pick the project you want to render. Create the rendered image render the view to create a photorealistic image of the 3d model.
Source: jooinn.com
Create a photorealistic image of the building model. View tab graphics panel (render) to present a design to clients or share it with team members, render the model using one of the following methods: Large images (greater than 5 megapixels) may need to be left overnight to become clear. Send the image to render: Define the view area to render.